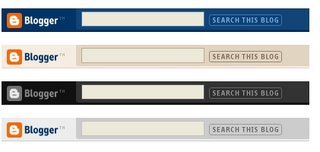
The main reason behind removing the NavBar is to make the blog look more like a website. I also find that it disturbs the flow of whatever design you have in mind. If you think that your readers may actually want to use the NavBar then leave it, other than that, get it off! One explanation I have heard for leaving it on is as an easy access for you to switch back to your dashboard. Personally, I always have 2 tabs open when editing anyway, one for the dashboard and one for the actual blog. This, for me, is a much easier way to make edits and see them work, as the Preview button may not always show you everything you want to check. Should something be wrong it is much easier this way to go back and undo what you just did.

Anyway, removing the NavBar. First you need to be in Design View and click on Edit HTML. As always, download the full template to keep a backup before you make any changes.
1. In Edit HTML find where it says:
This should be very near the top.
2. To remove the NavBar all you need to do is insert the following code above the variable definitions:
So your final code will look like this:
If you ever want to bring back the NavBar then just remove this code.

1. In Edit HTML find where it says:
/* Variable definitionsThis should be very near the top.
#navbar-iframe {display: none !important;}So your final code will look like this:
#navbar-iframe {

display: none !important;

}


/* Variable definitions

====================
If you ever want to bring back the NavBar then just remove this code.
 Italiano
 Facebook
 Twitter
No comments:
Post a Comment