Just after New Year, the backlight on the screen of my Toshiba U400 decided to give up. After 7 countries, over 20 flights, 100’s of trips in my backpack, and 2 years and 2 weeks of use it wasn’t happy anymore. The simple solution to this problem is to replace the light, or if necessary get a new inverter. Boring.
 |
Stock U400 Photo – as usual I forgot to take a picture of mine first |
My better half had decided on getting a MacBook Air (I don’t really like it but I can see why some people would absolutely love it, it’s what a Netbook should be, but with OS-X) so she would be giving me her laptop, which was better than mine. Time for a project. At my parent’s house computers aren’t allowed in bedrooms until Uni. My sister is only 16 so still has some way to go. At the moment she uses the internet on the DS Lite I gave her after “Lights out” for important Facebook business. While checking emails etc. on the DS is fine, it’s not really useful. So this project was destined to be a surprise present for her when I got back from Japan.
The idea was to have essentially a media centre PC, something to keep all her music, videos and pictures. I wanted it to play the music and videos well enough for viewing from her bed (her head would be about 2.5m behind the desk) but most importantly give her the internet. Not just so she could check stuff that seems important to her (but really isn’t ) but for Skype. Me and my brother live far away from her so the only real contact we get is by phone. Currently she has to Skype on the family computer which offers no privacy, this way she would be able to talk freely (and watch BBC iPlayer from her room).
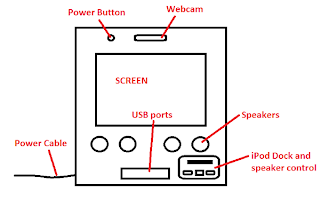 |
| The basic layout expertly created in Paint |
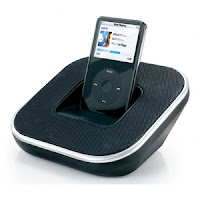 |
| Thompson iPod Speaker Dock |
I’m not much of a planner but I thought I would do something to give you an idea of what I’m doing. The computer will sit in a vertical position at the back of her desk, not taking much of the useable space. I’m hoping the depth can be kept to less than 10cm and the width to a sensible minimum. The power button and webcam will be position on the top, above the screen, and 4 sets of speakers below. The speakers are attached to the iPod Dock and speaker control. This is donated from a Thompson iPod dock that was given free with my iPod (from a shop in Australia call Dick Smith). The dock can charge the iPod when the PC is off, but will not connect it to the PC for syncing, my sister will have to do some work. Next there will be a few USB ports from a spare hub I have lying around and the power cables will come out the left hand side.
Before I show more let me state that prettiness on the inside is not really an issue here, it needs to look pretty from the outside, so there may be some less than ideal looks inside.
First up, take the laptop to pieces, my favourite part:
 |
| The bits |
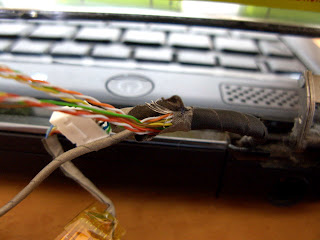
While peeling the cables from the back of the screen cover, the tape ripped one of the cables in two. All I can see now is a massive design flaw (unless I’m very wrong). The frayed wires you can see are from a cable that runs the same length and same direction and the coloured cables, yet it is bare! There is no sleeving. This can’t be normal, can it?
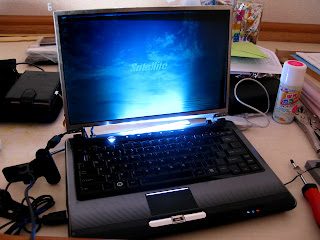
Anyway, once the majority of the dust was cleared out (there was a lot) I reattached the heatsink (using Arctic Silver) and put it back together for a quick test with some USB powered LEDs in place of a real backlight.
In this picture, there are 8 USB LEDs under the screen shining onto a piece of white Perspex balanced on a USB hub and the light itself. Not the best example I know but it shows that the basic idea of using the LEDs should work well enough (no high quality videos will be watched on here, just Mean Girls and the like…).
Next up building the back of the case. Here is some wood:
 |
The long piece is not bent, my camera seems to be exhibiting some major distortion |
Testing the first idea for the layout:
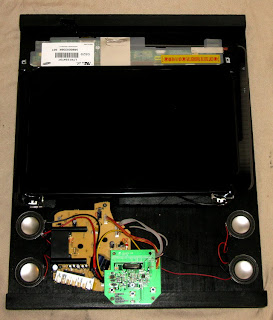
Bottom right is half of the wireless keyboard I intend to use to control the computer. It is actually a Play Station wireless keyboard and joystick module. There were pictures of this but my memory card decided to do a wipe out. The green board at the bottom is the speaker power and volume control with the iPod dock and the orange board is the amp and power. I will be using a cable splitter for the speaker socket on the motherboard so that her stereo or headphones can be plugged in.
After this I decided against removing the motherboard from the laptop body. Though it would be prettier inside like this, by leaving the keyboard and mouse attached and housed properly, maintenance for me would be easier. After this was decided, it was time to do a quick measure and mount the screen.
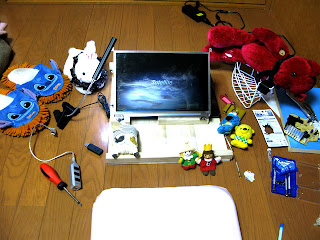
I apologize for this. I was trying to take a real photo but the other half kept adding toys into the frame. Then she made me promise to put it in so here it is. Anyway, you can see that the screen is mounted with the hinges still working.
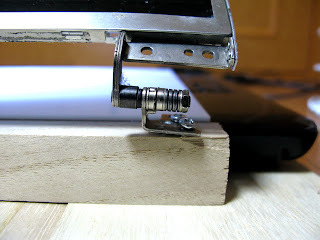 |
Here is some exquisite craftsmanship. Might need to tidy this one up… |
With the screen hinged up, I have access to the normal keyboard and touchpad so was able to reinstall windows, and boot up the software to allow the wireless gamepad to control the screen (http://atzitznet.no-ip.org/Joy2Mouse3/). It works!
With all this up and running it was time for a real test. I used two sets of the LED lights, one on the left and one on the right. The white Perspex was held behing using electrical tape, and a sheet of scuffed transparent Perspex and the diffuser sheet were laid between.
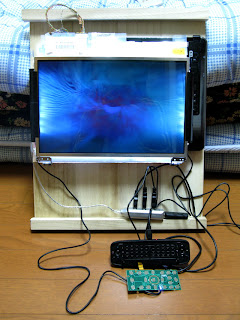 |
All hooked up and vertical with wires everywhere. Running on battery. |
 |
Showing backlight bleed and current contrast and brightness with room lights off. |
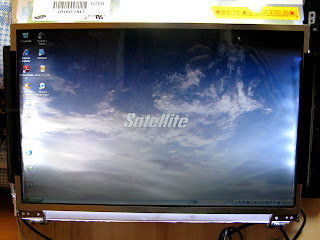 |
Screen brightness and light distribution with room lights on. |
 |
Close up of lighting distribution |
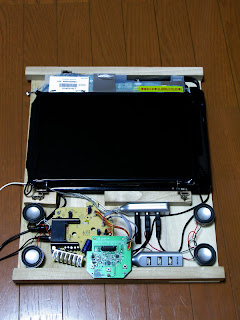
A few days later I had managed to sort out some of the positional aspects of the design. Above is what the finalised layout for the computer will be. I’ve swapped the placement of the USB hub and the speaker control to avoid any unnecessary rewiring. Also I have used electrical tape to prevent almost all of the backlight bleed from before, though I still have to do the top when everything is put together.
Here is a closer view of the bottom portion. I’ve rearranged the speaker position as I won’t be able to fit everything as I had originally intended, but it will still look nice like this, especially with speaker grills fitted on the front panel. The speakers themselves need to be rewired as the original wires are not long enough to reach the controller board.
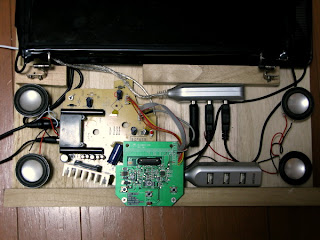
A closer view of the speaker PCBs. These are now fixed in place with foam from a make-up set acting as spacers. The orange/horrible brown board is the amp and power, the green board does the fun stuff. On the green board there is the connector for the iPod, and 3 buttons. If you look closely you can see a red LED, which is the power on light. Above that is the power switch, to the left of that volume down, and to the right volume up. I still haven’t thought of a nice way to actually click those buttons, but I’m sure I will.
On the left there are three cables coming away from the base. At the top, the white one, is part of the splitter cable. This will be connected to the left of the case to allow for headphones or bigger speakers. The two black cables at the bottom are the PC power and speaker power respectively.
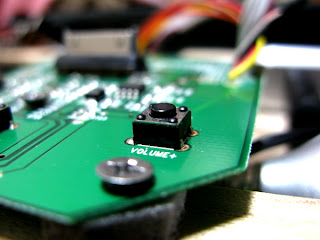 |
The all-important macro shot that everyone seems to have. Except that I don’t have a sexy motherboard to show off… |
Next jobs are, painting the inside of the case, refitting all the components already screwed in, finding a way to attach the speakers and USB hub, and making a cover for the whole thing.
Unfortunately, as I got to this point in the mod, Japan got hit by a 9.0 earthquake, resulting in a devastating tsunami and problems with a Nuclear power plant. I made a hasty departure from Japan and so the project had to be left behind. By the end I had painted the mounting frame and fixed the iPod dock and speakers. The screen had been fully light sealed and black electrical tape fixed around the metal edges of the screen to keep the colour flow when all was switched off. It was difficult to leave this behind, and I will be sure that the next project is built to impress. Here are the final shots.
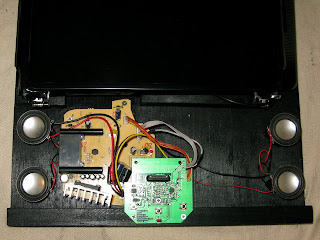
The speakers setup. They were fixed with super strong double sided tape and with an electrical tape wrap around two screws fixed either side of the speaker. There was no vibration even on full volume.
All together. Painted wood makes a lot of difference to how things look. It’s good to know this now as the next project will be mostly wood, and being able to visualise what the final product will look like is very useful.
After all this I have now decided to go bigger and better for the next project. Rest assured it will be a beauty, and not at all portable...
 Italiano
 Facebook
 Twitter



Excellent iv'e just torn apart my toshiba and my plan is to make a quiet and slim (invisible) media pc to place behind my smart tv but the original cooling mount is broken.. many nice tips and tricks😊
ReplyDelete